Tuesday, October 30, 2012

Haunted Forest 2012

Jake's family owns and runs a Haunted Forest each year on 
Grandma Seward's property.
It is quite the shin-ding.
They have been doing it for 7 years(says Jake, he's not sure) now.
This was the first year that they actually charged.
Everyone comes and donates their time.
Any donations went to building up the trail for the next year.
They told everyone that this would be the last year, 
but we will see...they had a LOT of people begging for it to continue.
Jake and I personally are ready to call it quits.
Here are some of the (nice)pics from this year. If you want to see more you can find them on 
good ol' fb.

Blake w/ the unchanged chain saw.

I don't know what this scene is...

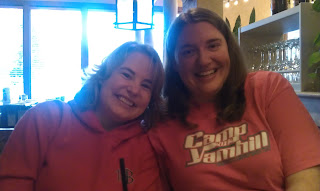
Mana with the sporting the t-shirts they sold this year.


Pharoh's Tomb

Mom and Mana collecting money and getting a head count. Just under 2000 went through this year.

Aliens

This is Jake as Jason. Wish I had never seen this.

Sadly I didn't get to babysit any of my cute nieces and nephew like I thought I would. I spent a quite night doing projects and mom and dads. Much better than being scared on the trail if you ask me. (Yes, I admit it. I'm a wimp!)

Mana Turns 26!

Today I got to spend the day with Amanda (Mana), Mom and Dad for Mana's birthday.
It was so fun...and well a little exhausting.
(I think shopping should be on the calorie counter list.)

First we had lunch at Olive Garden. Yum!
Mana eating her birthday dessert. Strawberry and white chocolate.
Yeah, I was a little jealous.


Dad and Mom
After since we were so close we had to go the Deseret Book. Mana got 4 books and added about another half a dozen to her Christmas list. Yup, she's a book worm and we all love it because 
she's got her own personal library. I'm reading one of her books now actually. :)

Then Mana wanted to go to the  DI (for more books of course).
I tried to convince her that she looked amazing in this hat and she should wear it the rest of the day.
Didn't work but at least I have a picture of the Awesomeness!

A Males Turkish Hat. You can't see but on top it was some kind of metal. I told her when it rained it would
play us music.  She still didn't buy it. Crazy woman ;)

Then we found an actual birthday hat but she didn't get it either. 
Mana is sure a fun sister. Love her!


Friday, October 12, 2012

Random

Yummy Pear...it memory of all the canning that I got to do this year with my new family. :)

Little Poette and my thumb. Wish I remembered how old she was when I took this.

Love this! Cracks me up every time.

Date Night. Walking in the mall...had to get Jake a Cinnabon. I admit it was Yummy,

Seward's front yard. Love this place!

Cam in his Birthday shirt we got him. 

Grandparents with grandkids. :)

My sweet Grandma Buck. Miss and Love her! She was beautiful even at  a 100!

Roberts' and siblings

Hanging Rod Picture Frames

This is an idea I got from Pinterest...but when I went to get directions on how to: I was sorely disappointed with only a picture.

The rod and frames I had already. The frames were silver from my wedding. The rod was used in my old apt. before I got married. Which we were not using because the size difference. The rod was a bronze color. So I got some spray paint and sprayed them all a metallic black. 

I also kept ribbon that was used to wrap a wedding gift that I used as well. So all I ended up spending for this project was for the spray paint which was about $6.

Since I had no instructions I played around for a few days trying to come up with the best game plan. Though I don't have a picture of it I layed out the pictures how I would like them to be placed on the rod and ribbon, then I
 Figure out measurements. Depending on the size of frames and rod  will depend on how far apart you will want each picture.

I used a cross stitch pattern to make the hoops that go on the rod.  I don't have a sewing machine ,but those who do I'm sure that would be much quicker.

I placed the ribbon behind each frame. Using the frame itself to hold the ribbon  in place.

Works great!

Putting the ribbon in sideways was much more difficult. I learned that  putting the ribbon  at the beginning of where the back of the frame would go to hold picture it place is the quickest way. After getting the ribbon into the middle of the frame it gets a little tricky. You need to hold the ribbon firmly in place while continuing to move the backing of the frame. I had to pinch the ribbon between my legs and then use my other two hands....but I got it.

Almost finished.


Once my sweet hubby helped me hang it up I then was able to play with the pictures to make sure they were straight. I was silly....and actually quite finished with this project so I didn't get a Finished picture...sorry.

I do love the addition, if I do say so myself. It was well worth the time and frustration it figuring everything out.


Bathroom Decor

I'm an amateur that's for sure. I learned a couple of things while doing this project....which probably those with common sense or at least a little experience would already have known. Guess I need to learn to ask questions.

My bathroom has nothing hanging on the walls. So I've desperately been wanting to find something that wouldn't be ruined with all the humidity.

I found these random shaped blocks of wood at goodwill for a $1 each. The other items I had in the apt. already. 

All the items needed.

Used the Elmer's glue to make design...this is a sun in case you couldn't tell.
Oh, and thick is best. It will show the best after painting.

Flower....after gluing wait....and  wait some more. The Glue needs to be completely dry before painting.


Sorry, it's a bad pic., but you get the idea.

Sunset w/ flower.

What I would do differently:
1. Remove paint with sand paper, before beginning. It caused problems with painting later...You can't see it in the picture here but the yellow has green streaks in it because of the black behind it.
2. I would double coat the Elmer's glue. After letting the first coat dry of course. As you can tell from the picture the sun and flower doing show up very well at all.
3. Be more careful when picking paint colors...both the yellow and the red are not that same colors as the rest of the decor. 
 Even though it didn't turn out like I had pictured I still like it much better than my plan white walls. :)